
This comprehensive, step-by-step guide provides detailed documentation to seamlessly walk you through the registration process for the WhatsApp API, in conjunction with the Waapy process of 2023. By following these clear instructions, you’ll successfully complete the registration for WhatsApp Business API Malaysia and WhatsApp Business API Singapore with ease.

Step 1 : Create Facebook Business Manager Account
- Go to business.facebook.com/overview.
- Click Create account.
- Enter a name for your business, your name and work email address and click Next.
- Enter your business details and click Submit.

- Key in all the necessary and actual information about the business.
- The email can be different from your personal Facebook email.
Step 2 : Get your Business account verify
- Go to Business Manager’s Security Centre. Click Start verification.
Note: You may have received a notification to begin verification in another platform, such as Meta Ads Manager, Commerce Manager and the App Developer Dashboard. - Provide your business’s details, including the legal business name, address, phone number and website.
Note: Make sure that the details you submit exactly match the details of your legal business entity. Also make sure that your business’s website loads and is HTTPS compliant. - Confirm your business’s details.
If no matching record is found, upload supporting documents, such as a business licence or articles of incorporation, to confirm the details you entered. - Choose a method to confirm your connection.
A confirmation code will be sent if you choose email, phone, text message or WhatsApp. To confirm via domain verification, follow these steps.- Email (The domain of your business email address must match the domain of your website.)
- Phone number
- Text message
- WhatsApp message
- Domain verification (You must have admin access to your site’s web host or DNS provider.)
- Domain verification (You must have admin access to your site’s web host or DNS provider.)
- When you’ve finished, click Done.
- The verification process take 1 – 14 days. It will usually email to you regarding the status. In case verification failed you can refer to their guideline https://www.facebook.com/business/help/2342133782492969?id=180505742745347
- If your business has been verified you will be able to see your company name with a verified tick beside it.
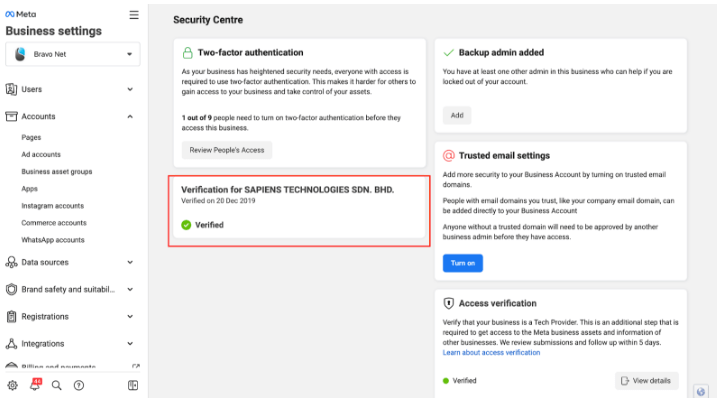
- For more info: https://www.facebook.com/business/help/2058515294227817?id=180505742745347
Step 3 : Create your WhatsApp Cloud API
- Proceed to these steps only after your Facebook Business account has been verified.
- Create a Facebook developer account in case you are not one yet. https://developers.facebook.com/docs/development/register
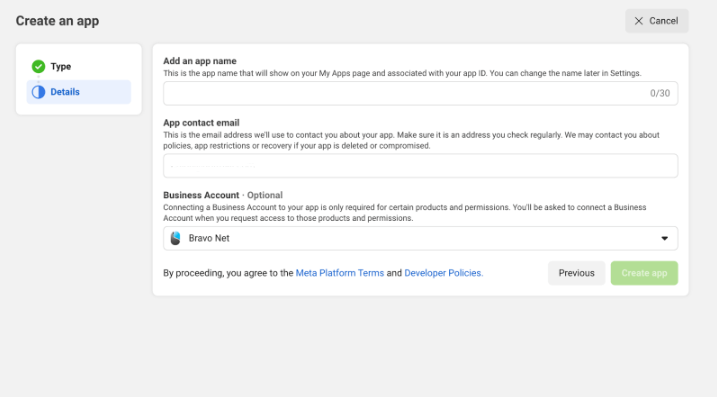
- Next is to create the WhatsApp developer site in here https://developers.facebook.com/apps/creation/
- Choose the right app type:


- Key in your app name and select the business account that has been verified to use for this WhatsApp application.
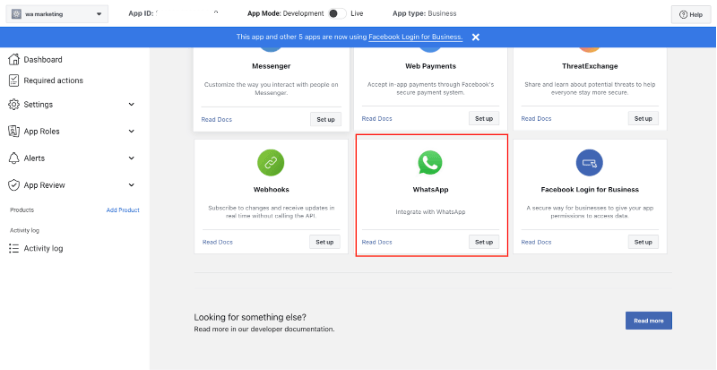
- Select WhatsApp in the product application page.
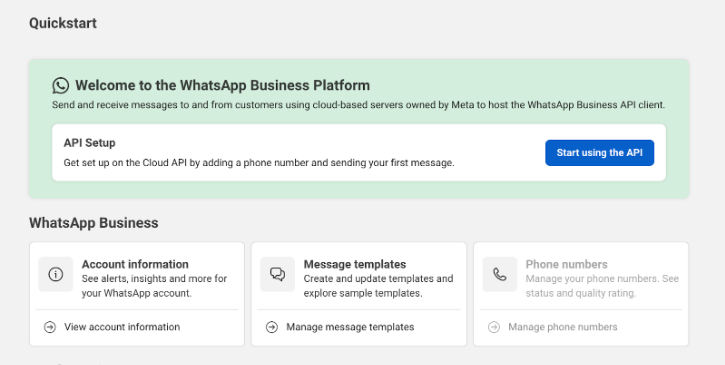
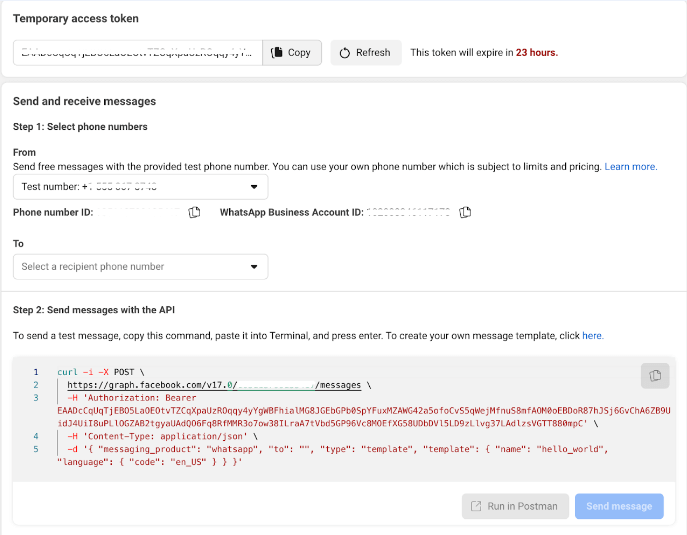
- Quick start by click on the button “Start using the API”.
- Step 1 & 2 is just playground to test out if the API access token is working fine. You can try to play with it just testing purpose.
- To add your number, you can refer to Step 5. Click on the “see the Overview page” link. You will be redirect to your WhatsApp account page.
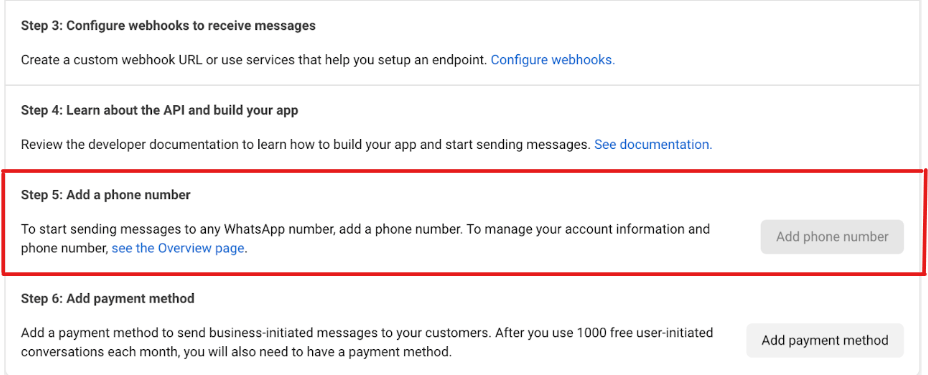
- Click on the 3 dot to add your WhatsApp number.
- Click on the “Add” button to add your WhatsApp number.
Notes:- Please use a new number. If you are using existing WhatsApp number, once connected to APIs it will not be available in the app.
- Register the number in a WhatsApp Business mobile app first. If you don’t, you might end up with error.
- The number must be able receive SMS. Phone call verification isn’t available for now.

- Once you have done, click on continue to verify your number with the SMS verification code given.
- Once you are done, you should be able to see your number appears in the API setup page.
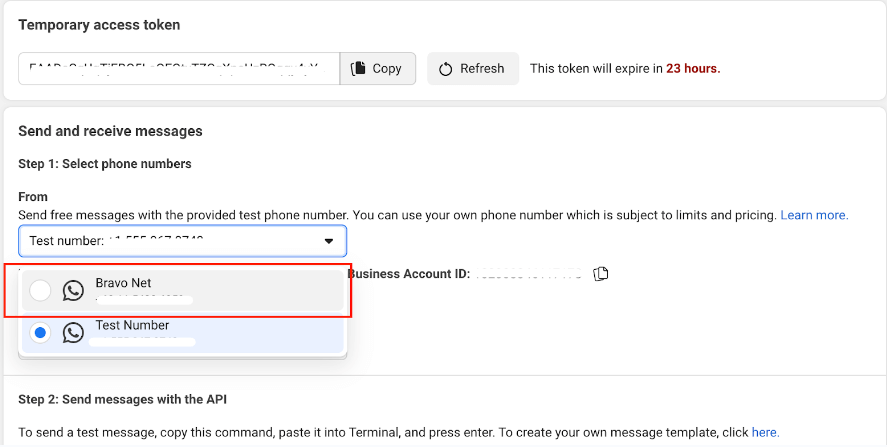
- Now you are ready to use the number to do a test send with the given temporarily access token.
- Use to token to and the other information input into Waapy system.

- In order to make the app mode live. There are some settings has to be configure, go to “Setting” > “Basic”.

- Fill in the app domain name (this can be Waapy’s domain), contact email, privacy policies & terms of service URL, and the application logo.
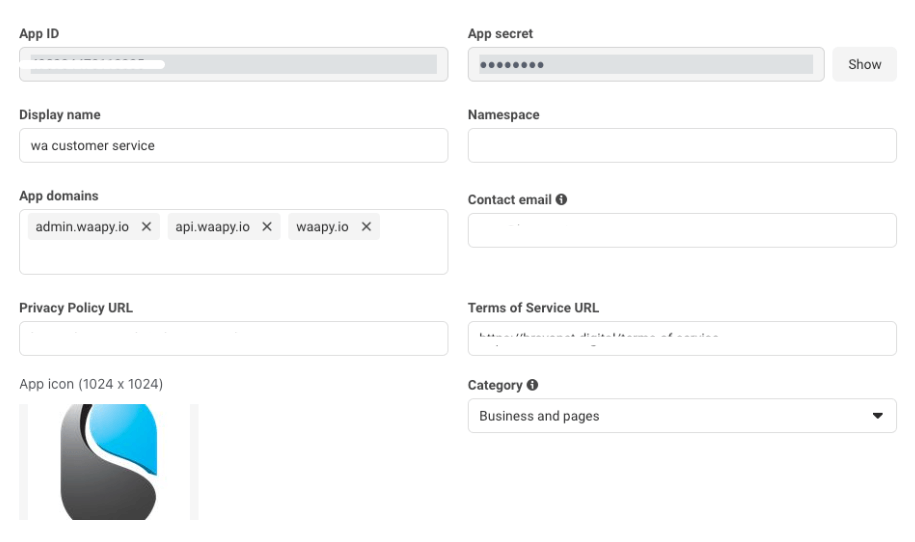
- If you business account is verified, you will be seeing the “Verified” indicator to be listed in.
- Insert the Data protection officer contact information, and proceed to save these settings.
- Get your permanent API access token. You follow the guide in this video tutorial https://www.youtube.com/watch?v=y2beqnlim6g
- Next is to setup webhook in your WhatApp application. Go to “WhatsApp” > “Configuration”
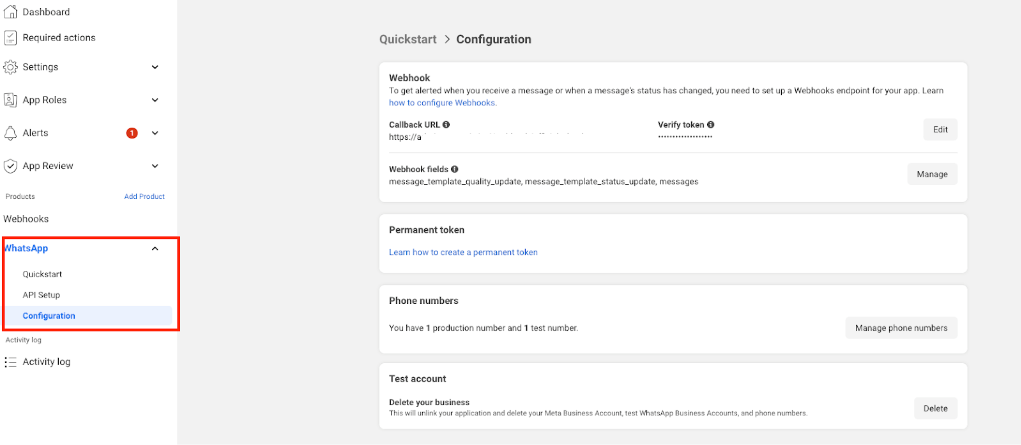
- Click on the edit button and insert the Webhook URL and the token.
- URL: https://admin.waapy.io/api/webhook/official_cloud
- Token: (will be given)
- Click on the manage button to allow which API to be use.
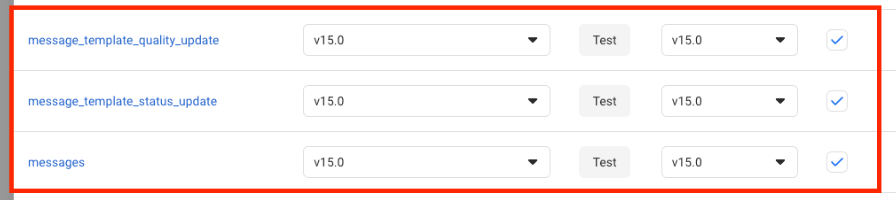
- In our case we will only need template & message to be enabled.
- URL: https://admin.waapy.io/api/webhook/official_cloud
- Congratulations, You’re now done with the registration.
In summary, this step-by-step guide makes registering for the WhatsApp Business API in Malaysia an easy process. You can also register for the WhatsApp Business API Singapore following the same steps